This is Part 3 of the AD DFIR Lab series. We configure pfSense to separate the attack network from the corporate network, forcing Kali to pivot like an external attacker.
Why pfSense
In Part 2 we created VMs split across two VLANs:
- VLAN 10 (192.168.10.0/24) — Corporate network with all DCs, servers and workstations
- VLAN 20 (192.168.20.0/24) — Isolated network with Kali
But VLANs alone do nothing useful — they need a router that decides what traffic can pass between them. That’s pfSense’s job.
Why pfSense and not just iptables on Proxmox? Three reasons:
- Realism: in a real corporate environment there’s a dedicated firewall between segments. Reproducing this in the lab gives more representative forensic artifacts
- Traceability: pfSense logs every blocked/allowed connection, just like an enterprise firewall
- Visual rules: the web UI lets you craft pivoting scenarios without touching
iptables
Why pfSense install is manual
Unlike Windows (autounattend), Ubuntu (cloud-init) or Kali (preseed in initrd), pfSense has no reliable unattended installation mechanism. Projects like mfsBSD allow some automation but for a one-shot install they’re more trouble than the manual process.
The install takes about 5 minutes via VNC. Here’s the full walkthrough.
Step-by-step installation
1. Accept copyright
Boot from the pfSense ISO (pfSense-CE-2.7.2-RELEASE-amd64.iso):
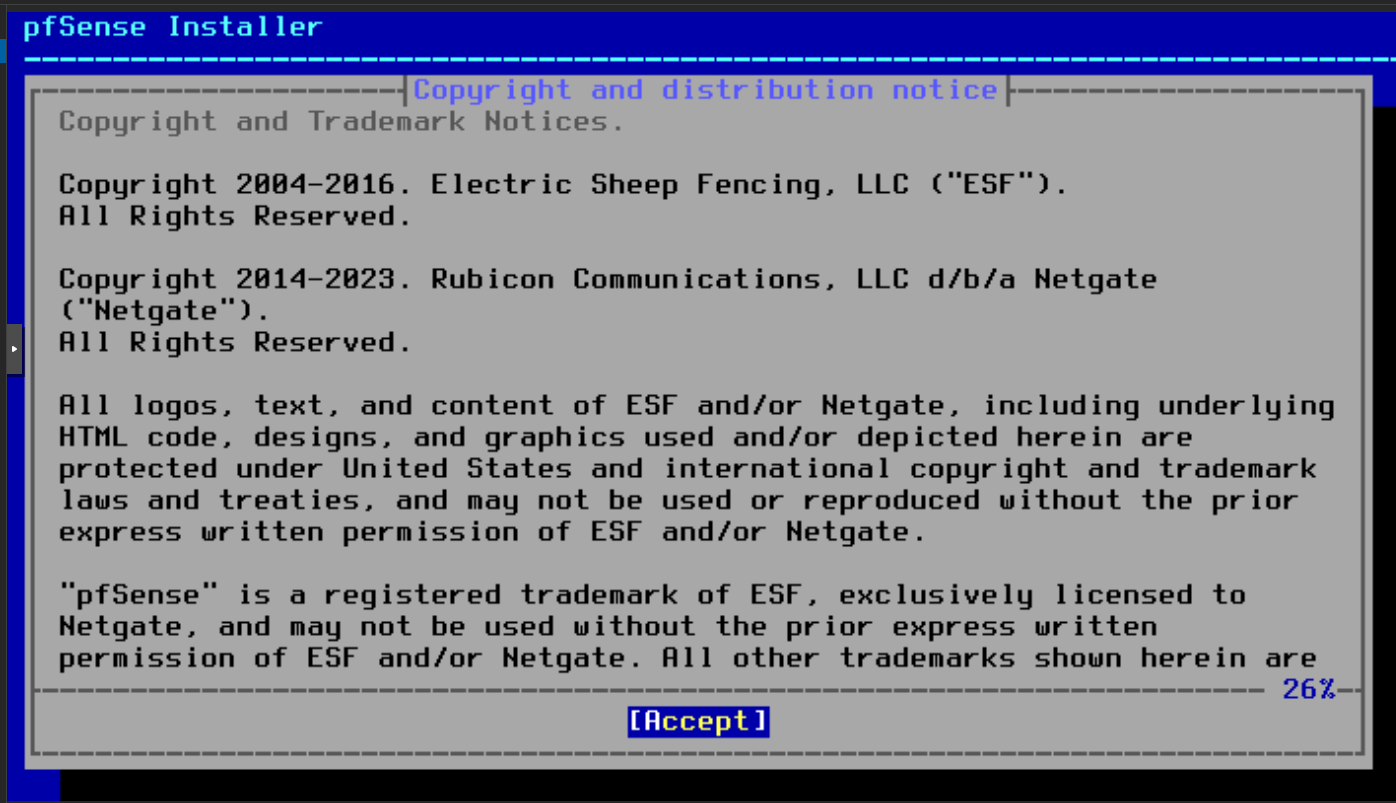
Enter to Accept.
2. ZFS partitioning
Go through the install menu: Install → default keymap → Auto (ZFS) → Install → Stripe → select disk:
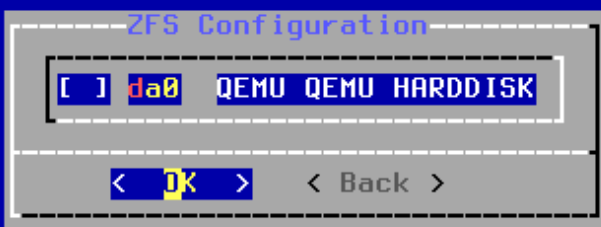
Space to mark da0, Tab to OK, Enter.
3. Confirm wipe
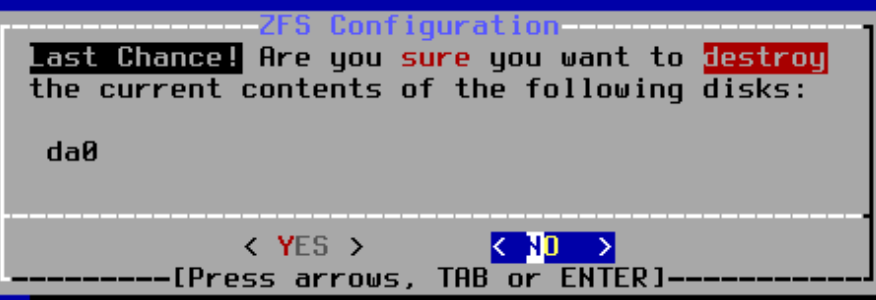
YES. Disk is empty, no risk.
4. Remove ISO before first boot
Important gotcha: when pfSense finishes installing and reboots, it boots from the ISO again. Remove it from Proxmox:
qm stop 100 --timeout 5
qm set 100 --delete ide2
qm set 100 --boot order=scsi0
qm start 100
Without this, pfSense asks to reinstall on every boot. Same problem we hit with Kali in Part 2.
5. Initial interface setup
After first boot of the installed system, pfSense asks about interface configuration:
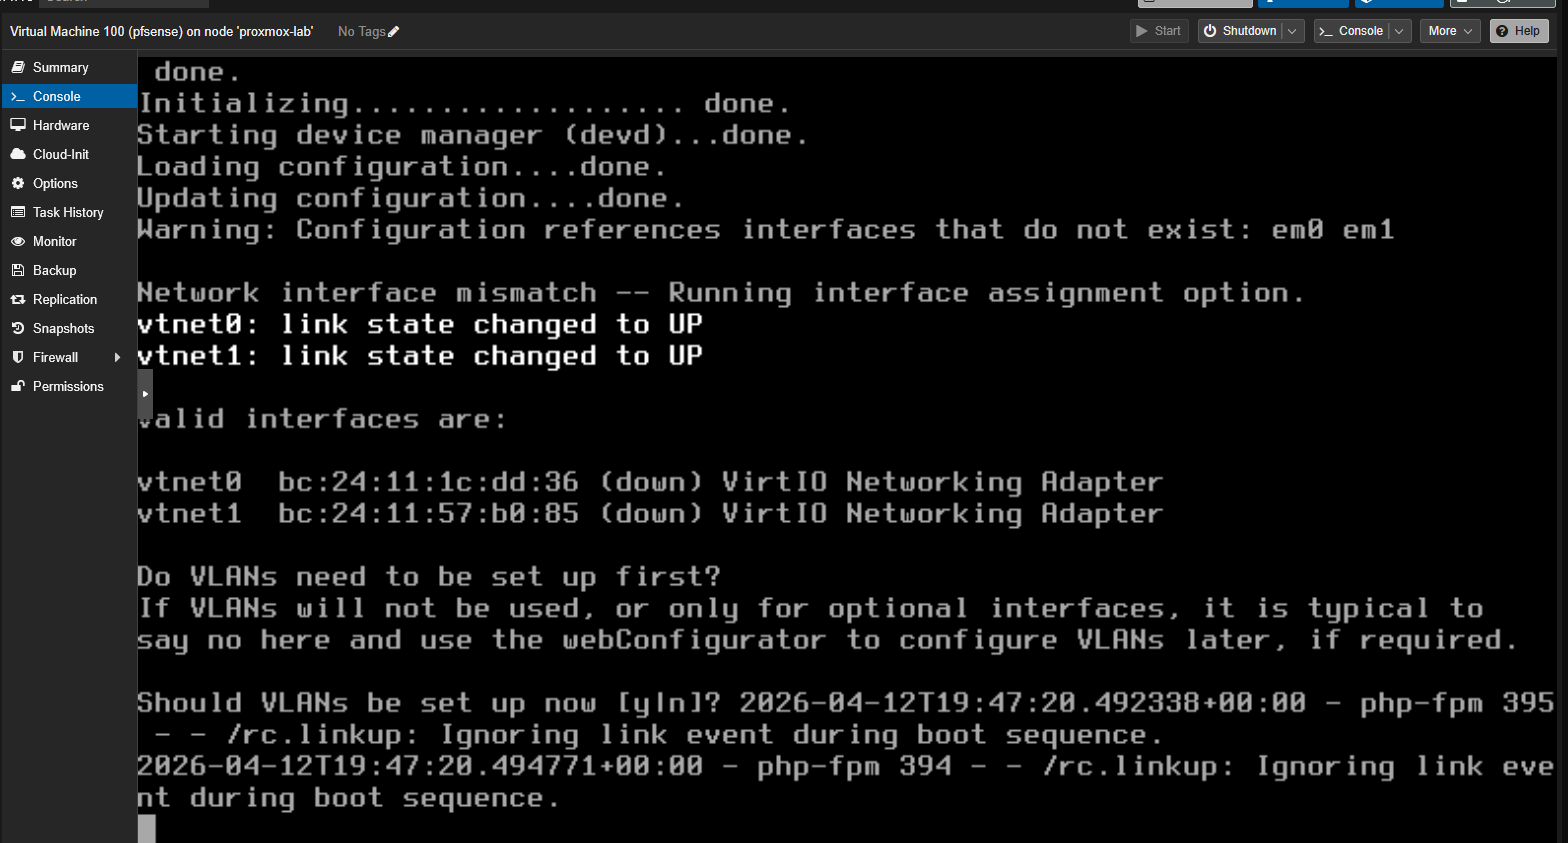
- “Should VLANs be set up now?” → n (no, VLANs are handled by Proxmox at the bridge level)
- “Enter the WAN interface name” → vtnet0 (our
--net0withtag=10)
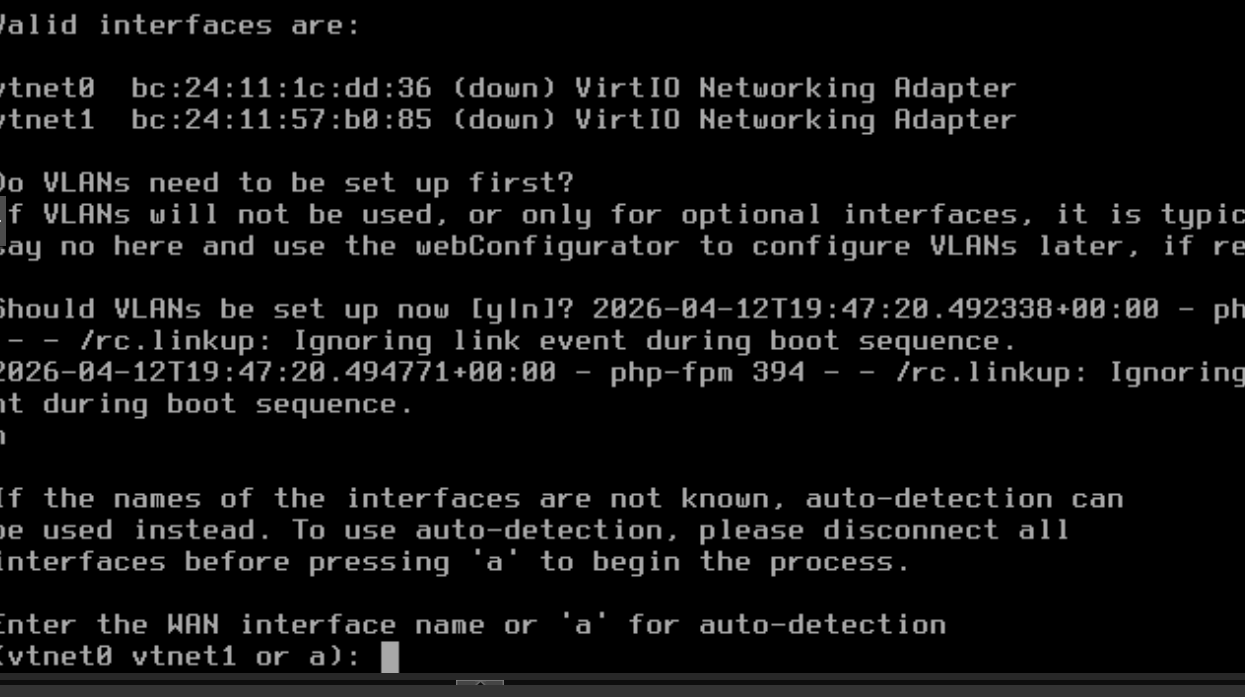
- “Enter the LAN interface name” → vtnet1 (our
--net1withtag=20) - Confirm → y
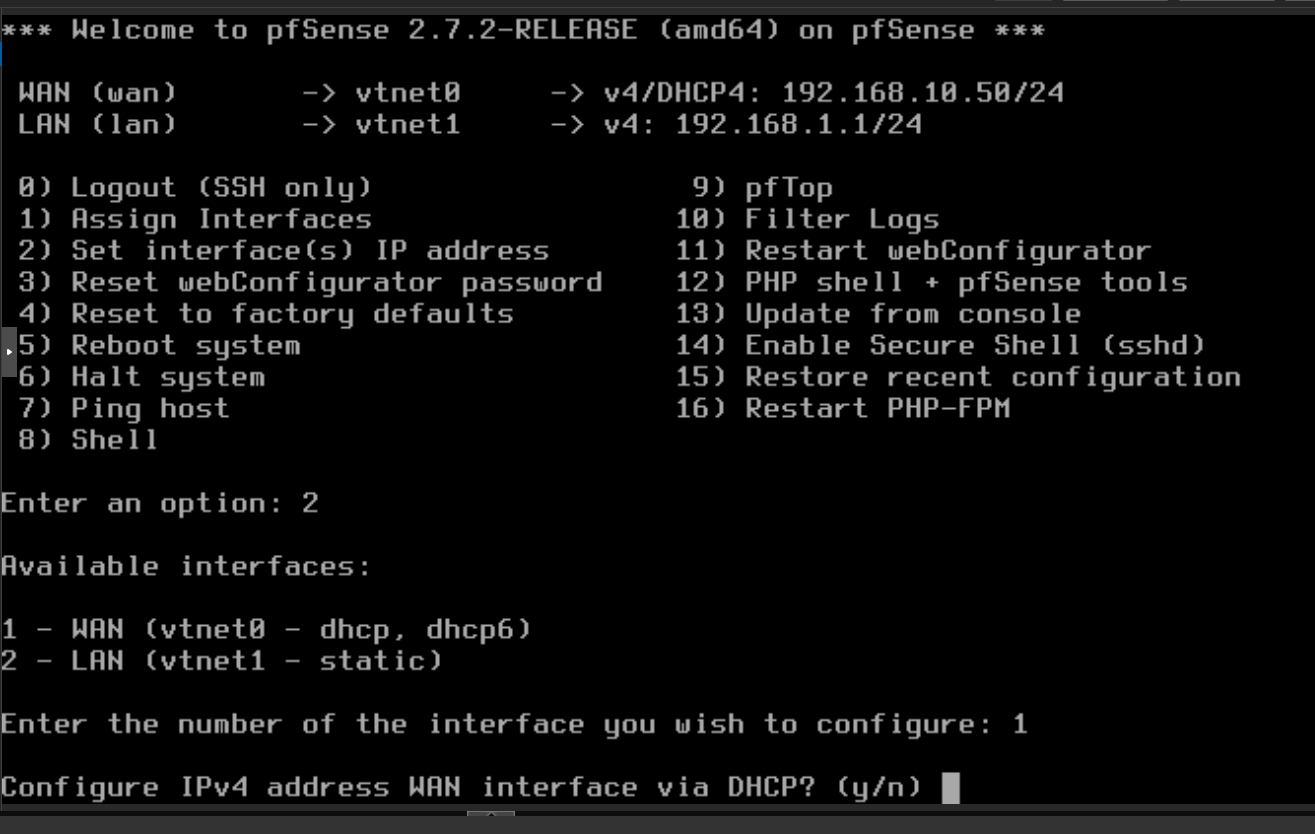
6. The console menu
We arrive at the pfSense main menu:

By default pfSense grabbed DHCP on WAN (192.168.10.50 from Proxmox’s temporary dnsmasq) and LAN is at 192.168.1.1. Both need to change to the lab IPs.
7. Configure static WAN IP
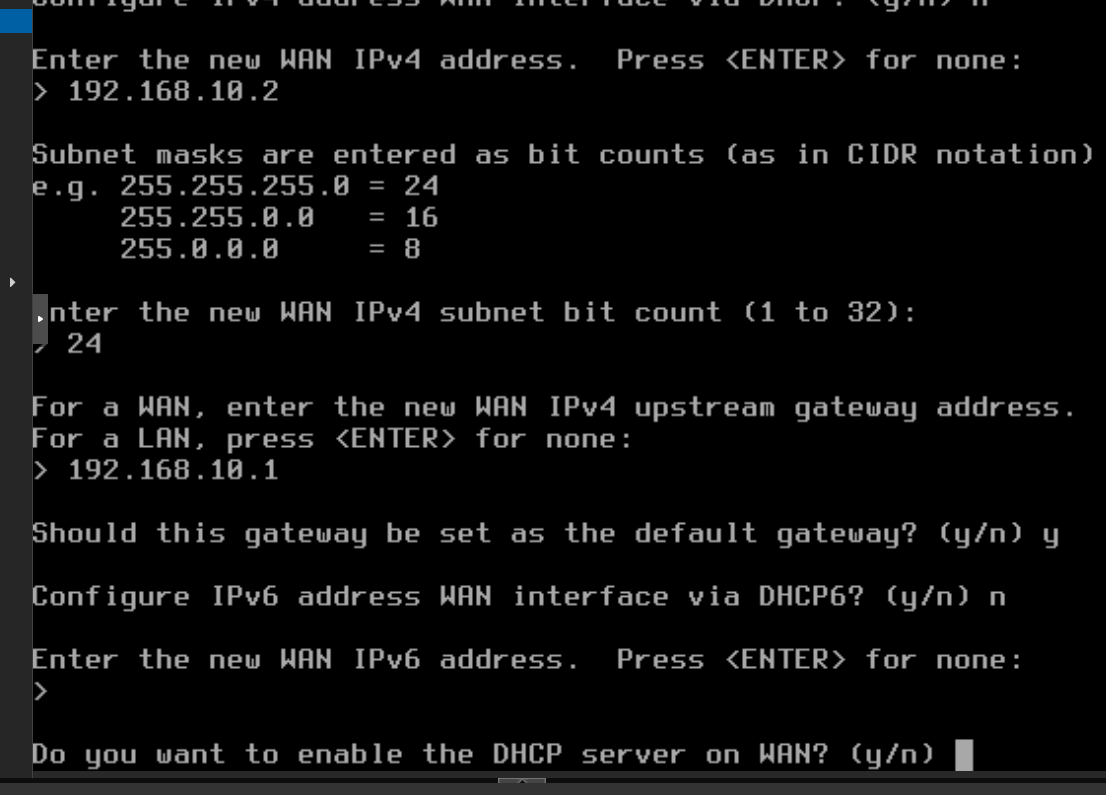
Option 2 (Set interface IP) → 1 (WAN) → n (no DHCP):
- IP:
192.168.10.2 - Subnet:
24 - Gateway:
192.168.10.1(Proxmox host, doing NAT to internet) - Default gateway:
y - IPv6:
n - DHCP server on WAN:
n(Windows VMs have static IPs)
8. Configure static LAN IP
Option 2 again → 2 (LAN) → n:
- IP:
192.168.20.1 - Subnet:
24 - Gateway: ENTER (LAN doesn’t need a gateway)
- IPv6:
n - DHCP server on LAN:
y - Range:
192.168.20.50to192.168.20.99 - Revert HTTP:
n
9. Final state
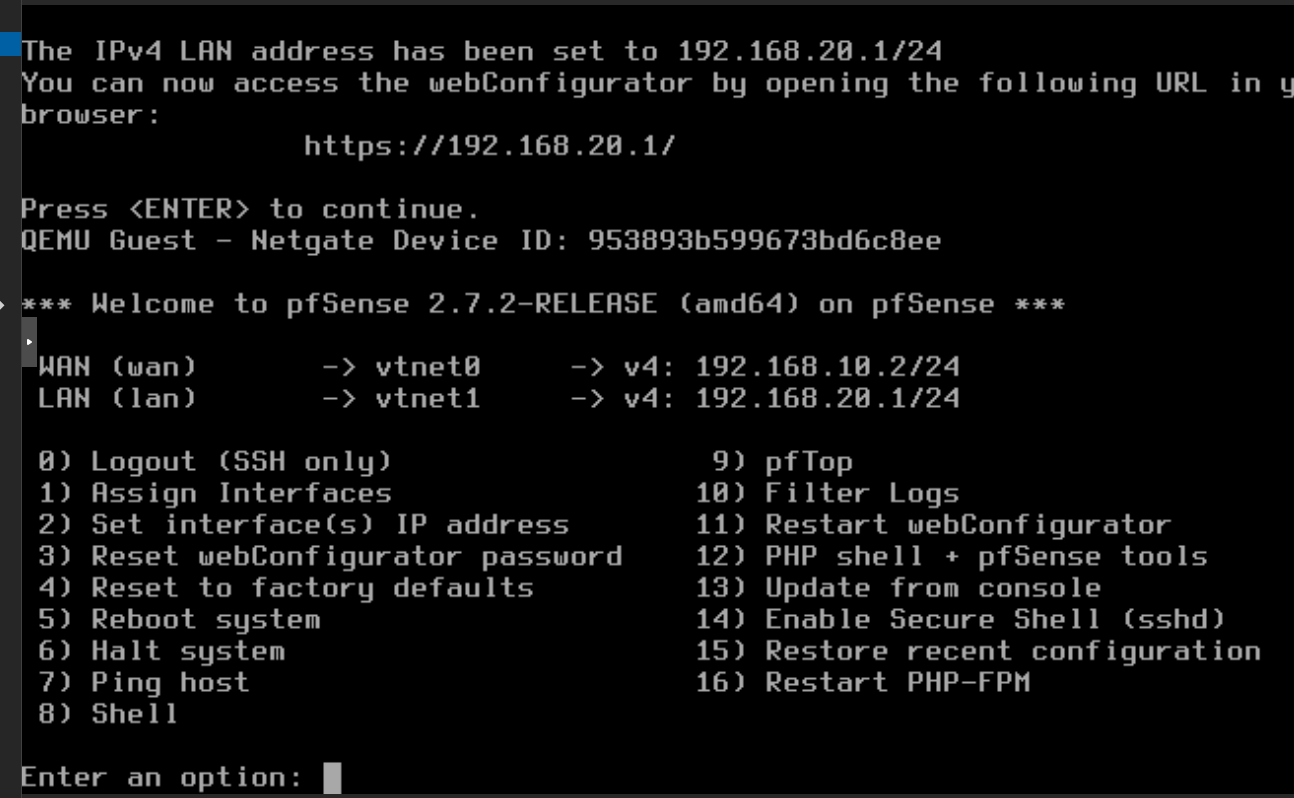
WAN (vtnet0) → 192.168.10.2/24
LAN (vtnet1) → 192.168.20.1/24
10. Enable SSH
Option 14 (Enable Secure Shell sshd). Default user: admin / pfsense.
Reconfigure Kali to use pfSense
Until now Kali used the Proxmox host (192.168.20.1 before) as its gateway. Now pfSense owns that IP. Since Kali’s static config was set with gateway 192.168.20.1, it automatically points to pfSense. Just verify:
qm guest exec 108 -- bash -c "ip route show; ping -c 2 192.168.20.1"
And make sure the Proxmox host no longer holds .20.1:
ip addr del 192.168.20.1/24 dev vmbr0.20
# Add management IP for SSH to pfSense from the host
ip addr add 192.168.20.254/24 dev vmbr0.20
Verification
# Kali → internet via pfSense
ssh root@PROXMOX 'qm guest exec 108 -- curl -s -o /dev/null -w "HTTP %{http_code}" https://google.com'
# HTTP 200

# Kali → pfSense LAN
ssh root@PROXMOX 'qm guest exec 108 -- ping -c 2 192.168.20.1'
# 0% packet loss

# SSH to pfSense from Proxmox
ssh root@PROXMOX 'sshpass -p pfsense ssh admin@192.168.20.1 "ifconfig vtnet0 | grep inet"'
# inet 192.168.10.2 netmask 0xffffff00
And confirm NAT is active on pfSense:
sshpass -p pfsense ssh admin@192.168.20.1 'pfctl -sn | grep -i nat'
# nat on vtnet0 inet from 192.168.20.0/24 to any -> 192.168.10.2 port 1024:65535
Kali appears as 192.168.10.2 when connecting to Windows VMs. This is important for attacks — the attacker doesn’t show up with their real IP (192.168.20.100) but with the firewall’s, exactly like what happens when an external attacker pivots through a perimeter device.
Default security posture
By default pfSense blocks all WAN→LAN traffic. This means:
- ✅ Kali can initiate connections to Windows VMs (LAN→WAN allowed)
- ❌ Windows VMs cannot initiate connections to Kali (WAN→LAN blocked)
This reproduces the realistic scenario: an attacker on Kali has gained access, and must pivot from Kali into the domain without the domain being able to scan back.
For more complex attack scenarios (meterpreter callbacks, reverse connections), we’ll add specific rules in pfSense later.
WireGuard: lab access from outside
So far all lab access is via SSH to the Proxmox host (qm guest exec, VNC consoles). To actually work with the VMs (RDP to Windows servers, open the pfSense web UI, do SMB) we need a VPN.
The original plan was WireGuard on pfSense, but we ended up putting it directly on the Proxmox host because:
wireguard-toolsis already installed since Phase 2- The host has the public Hetzner IP — pfSense doesn’t
- The host already has routes to
vmbr0.10andvmbr0.20 - 5 minute setup vs 30+ via the pfSense web UI
Server config
mkdir -p /etc/wireguard && cd /etc/wireguard
umask 077

# Generate keys
wg genkey | tee server-private.key | wg pubkey > server-public.key
wg genkey | tee client-private.key | wg pubkey > client-public.key

cat > /etc/wireguard/wg0.conf <<EOF
[Interface]
Address = 10.99.99.1/24
ListenPort = 51820
PrivateKey = $(cat server-private.key)

PostUp = iptables -A FORWARD -i wg0 -j ACCEPT; iptables -A FORWARD -o wg0 -j ACCEPT; iptables -t nat -A POSTROUTING -o vmbr0 -j MASQUERADE
PostDown = iptables -D FORWARD -i wg0 -j ACCEPT; iptables -D FORWARD -o wg0 -j ACCEPT; iptables -t nat -D POSTROUTING -o vmbr0 -j MASQUERADE

[Peer]
PublicKey = $(cat client-public.key)
AllowedIPs = 10.99.99.2/32
EOF

sysctl -w net.ipv4.ip_forward=1
systemctl enable --now wg-quick@wg0
Client config (operator’s PC)
[Interface]
PrivateKey = <client-private-key>
Address = 10.99.99.2/24
DNS = 192.168.10.10

[Peer]
PublicKey = <server-public-key>
Endpoint = 95.217.226.229:51820
AllowedIPs = 10.99.99.0/24, 192.168.10.0/24, 192.168.20.0/24
PersistentKeepalive = 25
AllowedIPs includes both lab VLANs, so you can RDP to Windows (192.168.10.x) and SSH to Kali (192.168.20.100) from your PC.
Gotcha: error 0x38 when activating the tunnel on Windows
The first time you activate the tunnel in WireGuard for Windows it can fail with:
Failed to setup adapter (problem code: 0x38)
Unable to create network adapter: The device is not ready for use.
It’s a WinTun driver issue when there was a previous version installed. Fix: reboot the PC. After reboot, open WireGuard as administrator and the tunnel activates without issues.
Verification
Once connected:
# From your PC
ping 192.168.10.10 # DC01-kingslanding
ping 192.168.20.100 # KALI-nightking
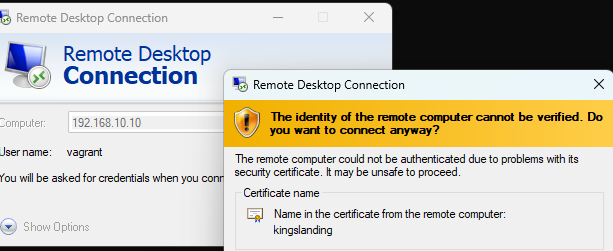
mstsc /v:192.168.10.10 # RDP to DC01 (vagrant/vagrant)
The RDP certificate confirms the kingslanding hostname:
From here you have an “as if you were inside” connection to the lab’s corporate network.
Internet exposure
Is pfSense exposed to the internet? No. Layers of protection:
- Private IP: pfSense WAN (192.168.10.2) is RFC1918, not routable
- No port forwarding: the Proxmox host doesn’t forward any port to the lab
- pfSense firewall: blocks all inbound WAN traffic
Only the Proxmox host (95.217.226.229) is exposed, and only via SSH key + authenticated Web UI.
Next: Part 4 — Crowning the Domain Controllers: AD, Forests and Trusts with GOAD
Previous: Part 2 — The Seven Kingdoms: Deploying Windows VMs
$ comments